Project: Show or hide the password
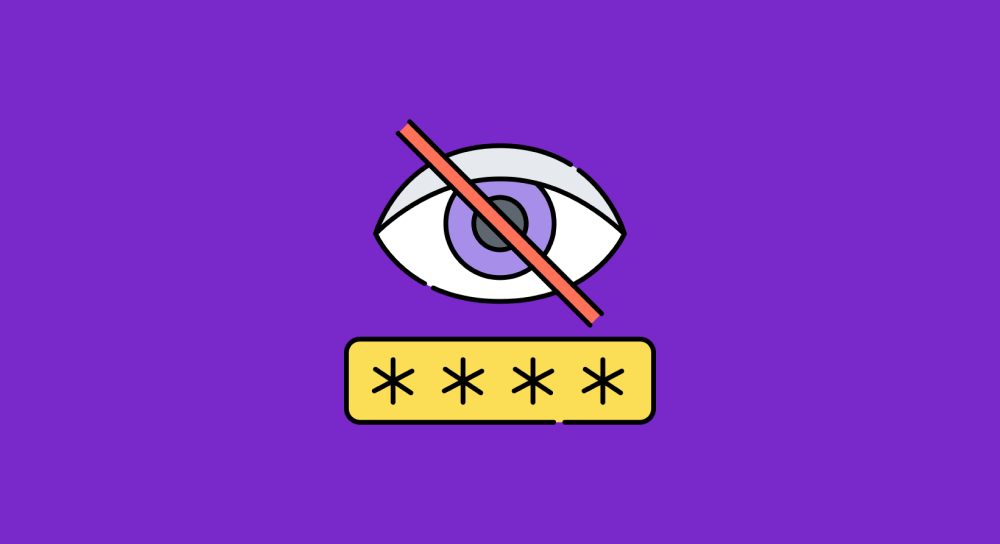
In this lesson, we will learn how to enhance a login form.
And we will do that by providing a mechanism for the users to show or hide the password.
Along the way, you'll cement your understanding of essential concepts of Javascript such as:
- Events
- Boolean expressions
- If...Else conditional statements
The starter files
Come on go ahead and download the project starter files:
Next, open up the project folder inside your code editor.
If all goes well, you should see the following project structure:
.
└── show-hide-password-starter-files/
    ├── index.html
    ├── style.css
    └── index.js
Now, open up the index.html in the browser and you should see the following output:

The HTML Code
If you peek inside the code of index.html, it's nothing fancy.
<html lang="en">
    <head>
        ...
        <link rel="stylesheet" href="style.css" />
    </head>
    <body>
        <form class="login-form">
            <div class="fields-container">
                <h1>Hi, Welcome back!</h1>
                <label for="email">Email</label>
                <input class="email-field" id="email" type="email" placeholder="Email">
                <label for="password">Password</label>
                <input class="password-field" id="password" type="password" placeholder="Password">
                <input type="Submit" value ="Log In" />
            </div>
        </form>
        <script src="index.js"></script>
    </body>
</html>- I have linked both CSS and Javascript files
- At the center of the file, there is a
formelement that contains the HTML code for the login form. And our total focus will be here.
Similarly, CSS code is pretty basic too
It contains the code for styling the login form and nothing much.
The Javascript code
Finally, the Javascript file is empty and you have to write code inside it.
Now, let's talk about how we can implement the show/hide password functionality.
There are two ways to implement show/hide password
There must be some way the user can request us that they want to see the password entered in the "Password" field.
So, we have to provide an option for the user to show or hide their password and we can achieve this in two ways:
1) By providing a checkbox underneath the password field

For example, Google's Gmail uses this checkbox technique.
2) By providing an "eye icon" button inside the password field itself
For example, the WordPress admin login screen uses this eye icon technique.
You can go with any approach
Both the "checkbox" approach and the "eye icon" approach work in the same way.
They both are accessible and easy to use.
So, according to my experience, it all boils down to the UI design preference and nothing else.
And for this project, we are going with the "checkbox underneath the password field" approach.
But currently, we don't have it set up inside our project code.
So, let's work on it
If you haven't downloaded the starter files, now is the time :P
Add the "Show password" checkbox field
Open up the index.html inside your code editor and type the following code after the password input field and preview it in the browser.
<label for="show-password">
    <input type="checkbox" id="show-password">
    <span>Show password</span>
</label>
It is just a simple checkbox field wrapped inside a label field.
Wrapping the checkbox field inside a label field enables the user to toggle the checkbox when the label is clicked.
The updated HTML code of the form should look like this:
<form class="user-form" id="login-form">
<div class="fields-container">
<h1>Hi, Welcome back!</h1>
<label for="email">Email</label>
<input class="email-field" id="email" type="email" placeholder="Email">
<label for="password">Password</label>
<input class="password-field" id="password" type="password" placeholder="Password">
<label for="show-password">
<input type="checkbox" id="show-password">
<span>Show password</span>
</label>
<input type="Submit" value ="Log In" />
</div>
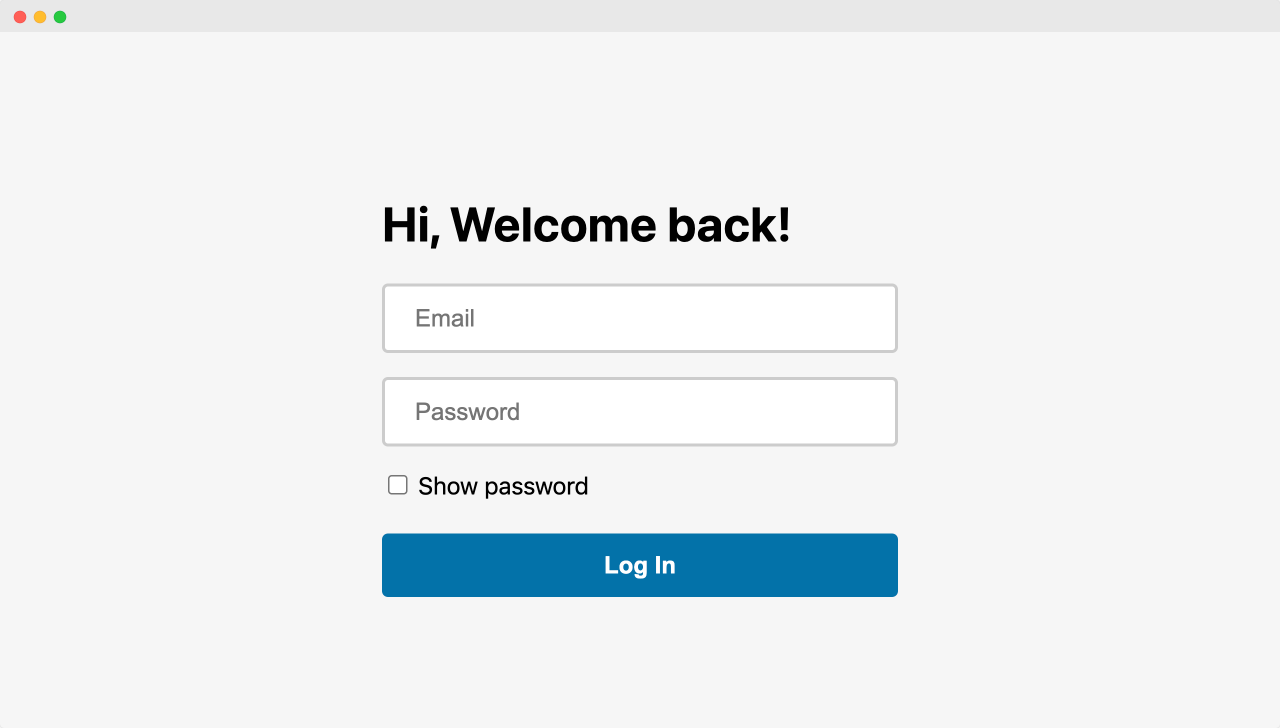
</form>Come on, let's check it out. Open up the index.html in the browser:
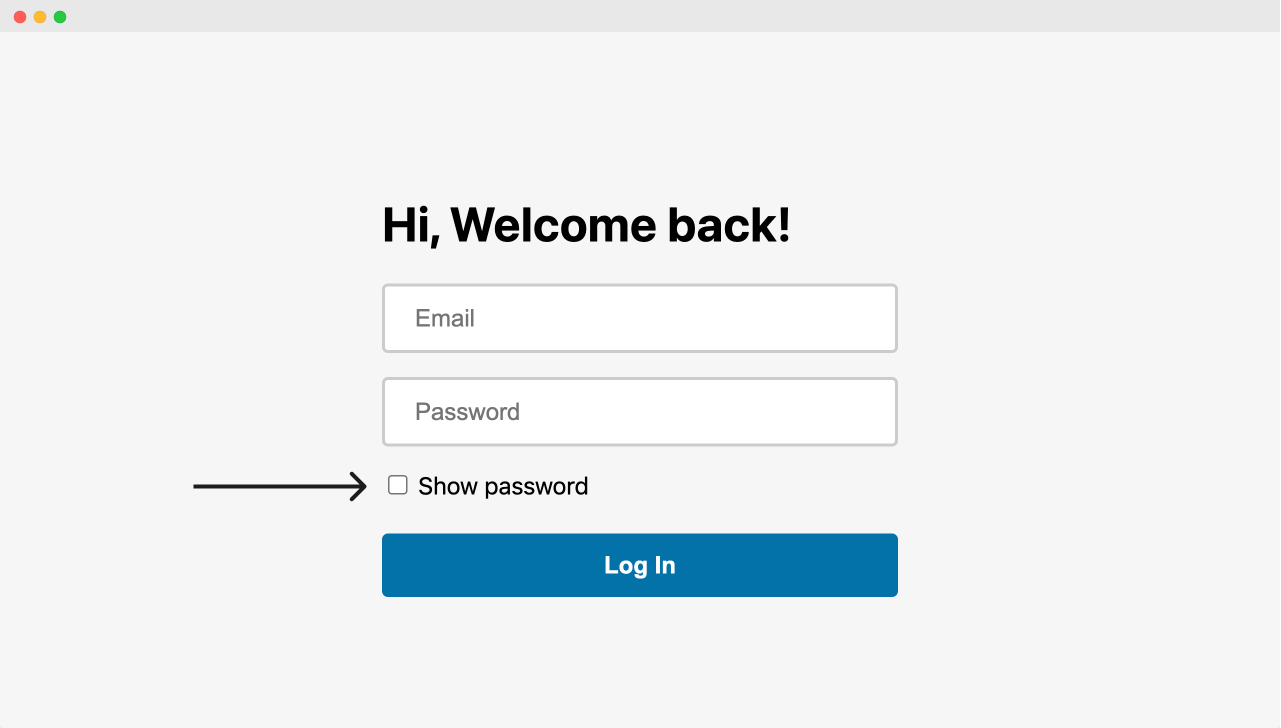
Great, everything is in its place.
Next, when the "Show password" field is clicked:
- If the field becomes checked, we need to reveal the password.
- Else, if the field becomes unchecked, we need to hide the password again.
Let's make the show/hide password functionality work
Open up the index.js file and type the following code:
//Step 1: Select the "show-password" input element
let showPasswordField = document.querySelector("#show-password");

showPasswordField.addEventListener("click", function(){
    let passwordField = document.querySelector("#password");

    //Everytime the user clicks on the "Show password" field, first check whether the field is "checked"
    if( showPasswordField.checked ){
        //If yes, then execute this line of code to reveal the password
        passwordField.type = "text";
    }
    else {
        //If not, then execute this line of code to hide the password
        passwordField.type = "password";
    }
}
});
Long theory short, in the above code:
- We are selecting the "Show password" field and adding a
clickevent listener to it. - And when the field is clicked, we are evaluating if the "Show password" field is currently checked or not. We are evaluating using the If/else statement and its condition
showPasswordField.checked. - If it is checked, the code inside the "If" block will get executed to reveal the password.
- If it is not checked, the code inside the "Else" block will get executed to hide the password.
That's all.
Now let's dive deep into the above code by going through its execution flow.
The flow of code
The initial state
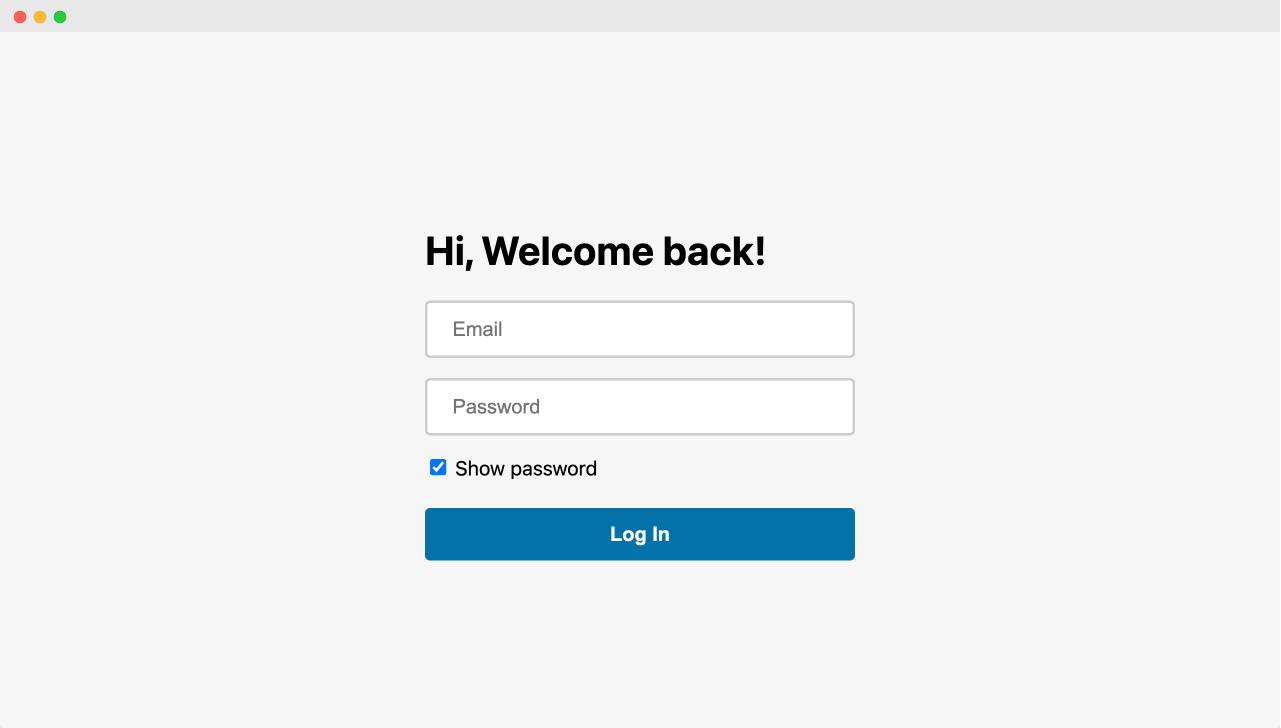
Initially, when the index.html is loaded, the "Show password" field is unchecked.
When the field is clicked for the first time, it becomes checked.
And because we have attached an event listener to the field, the code inside the event handler will start executing line by line.
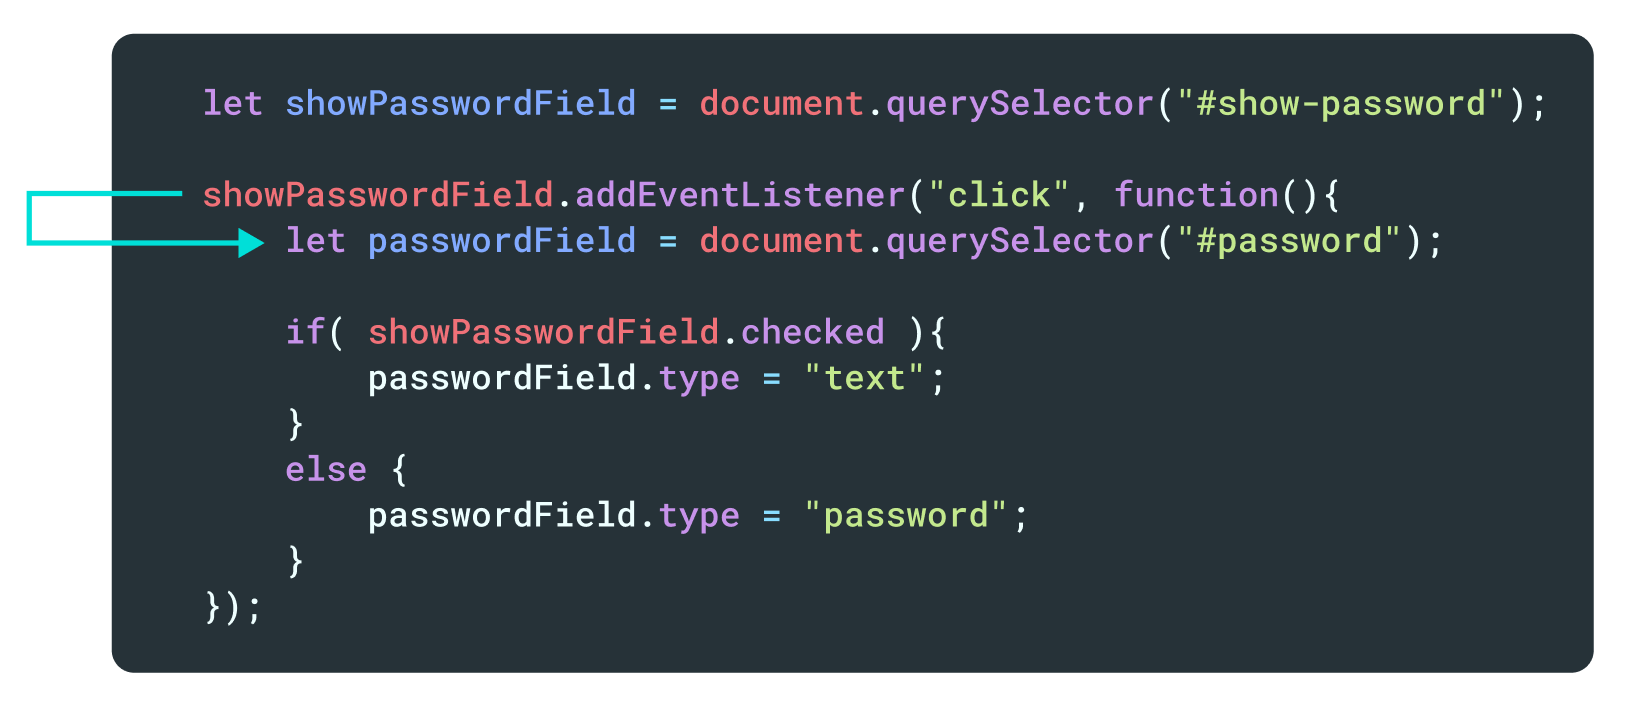
Inside the handler, first, we are selecting the Password field.
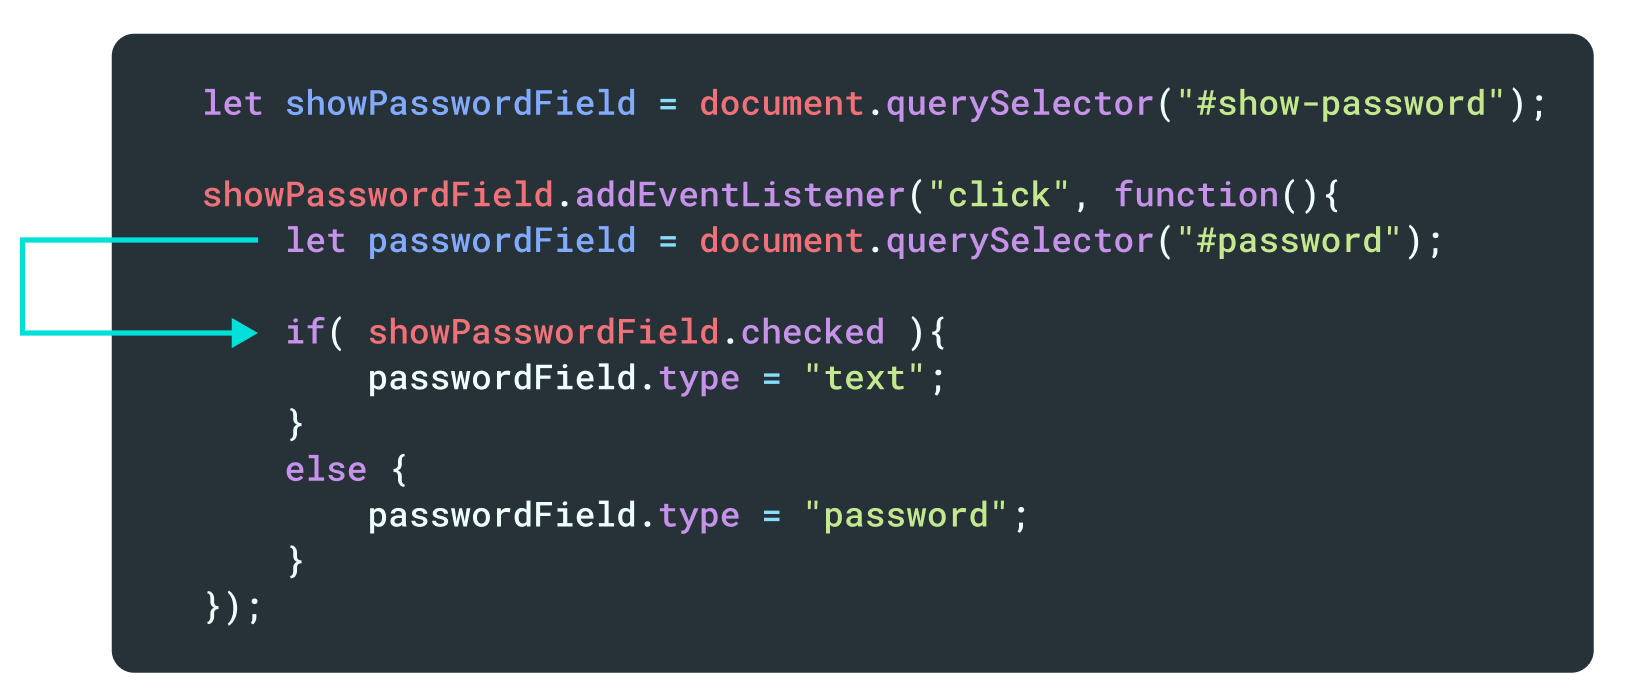
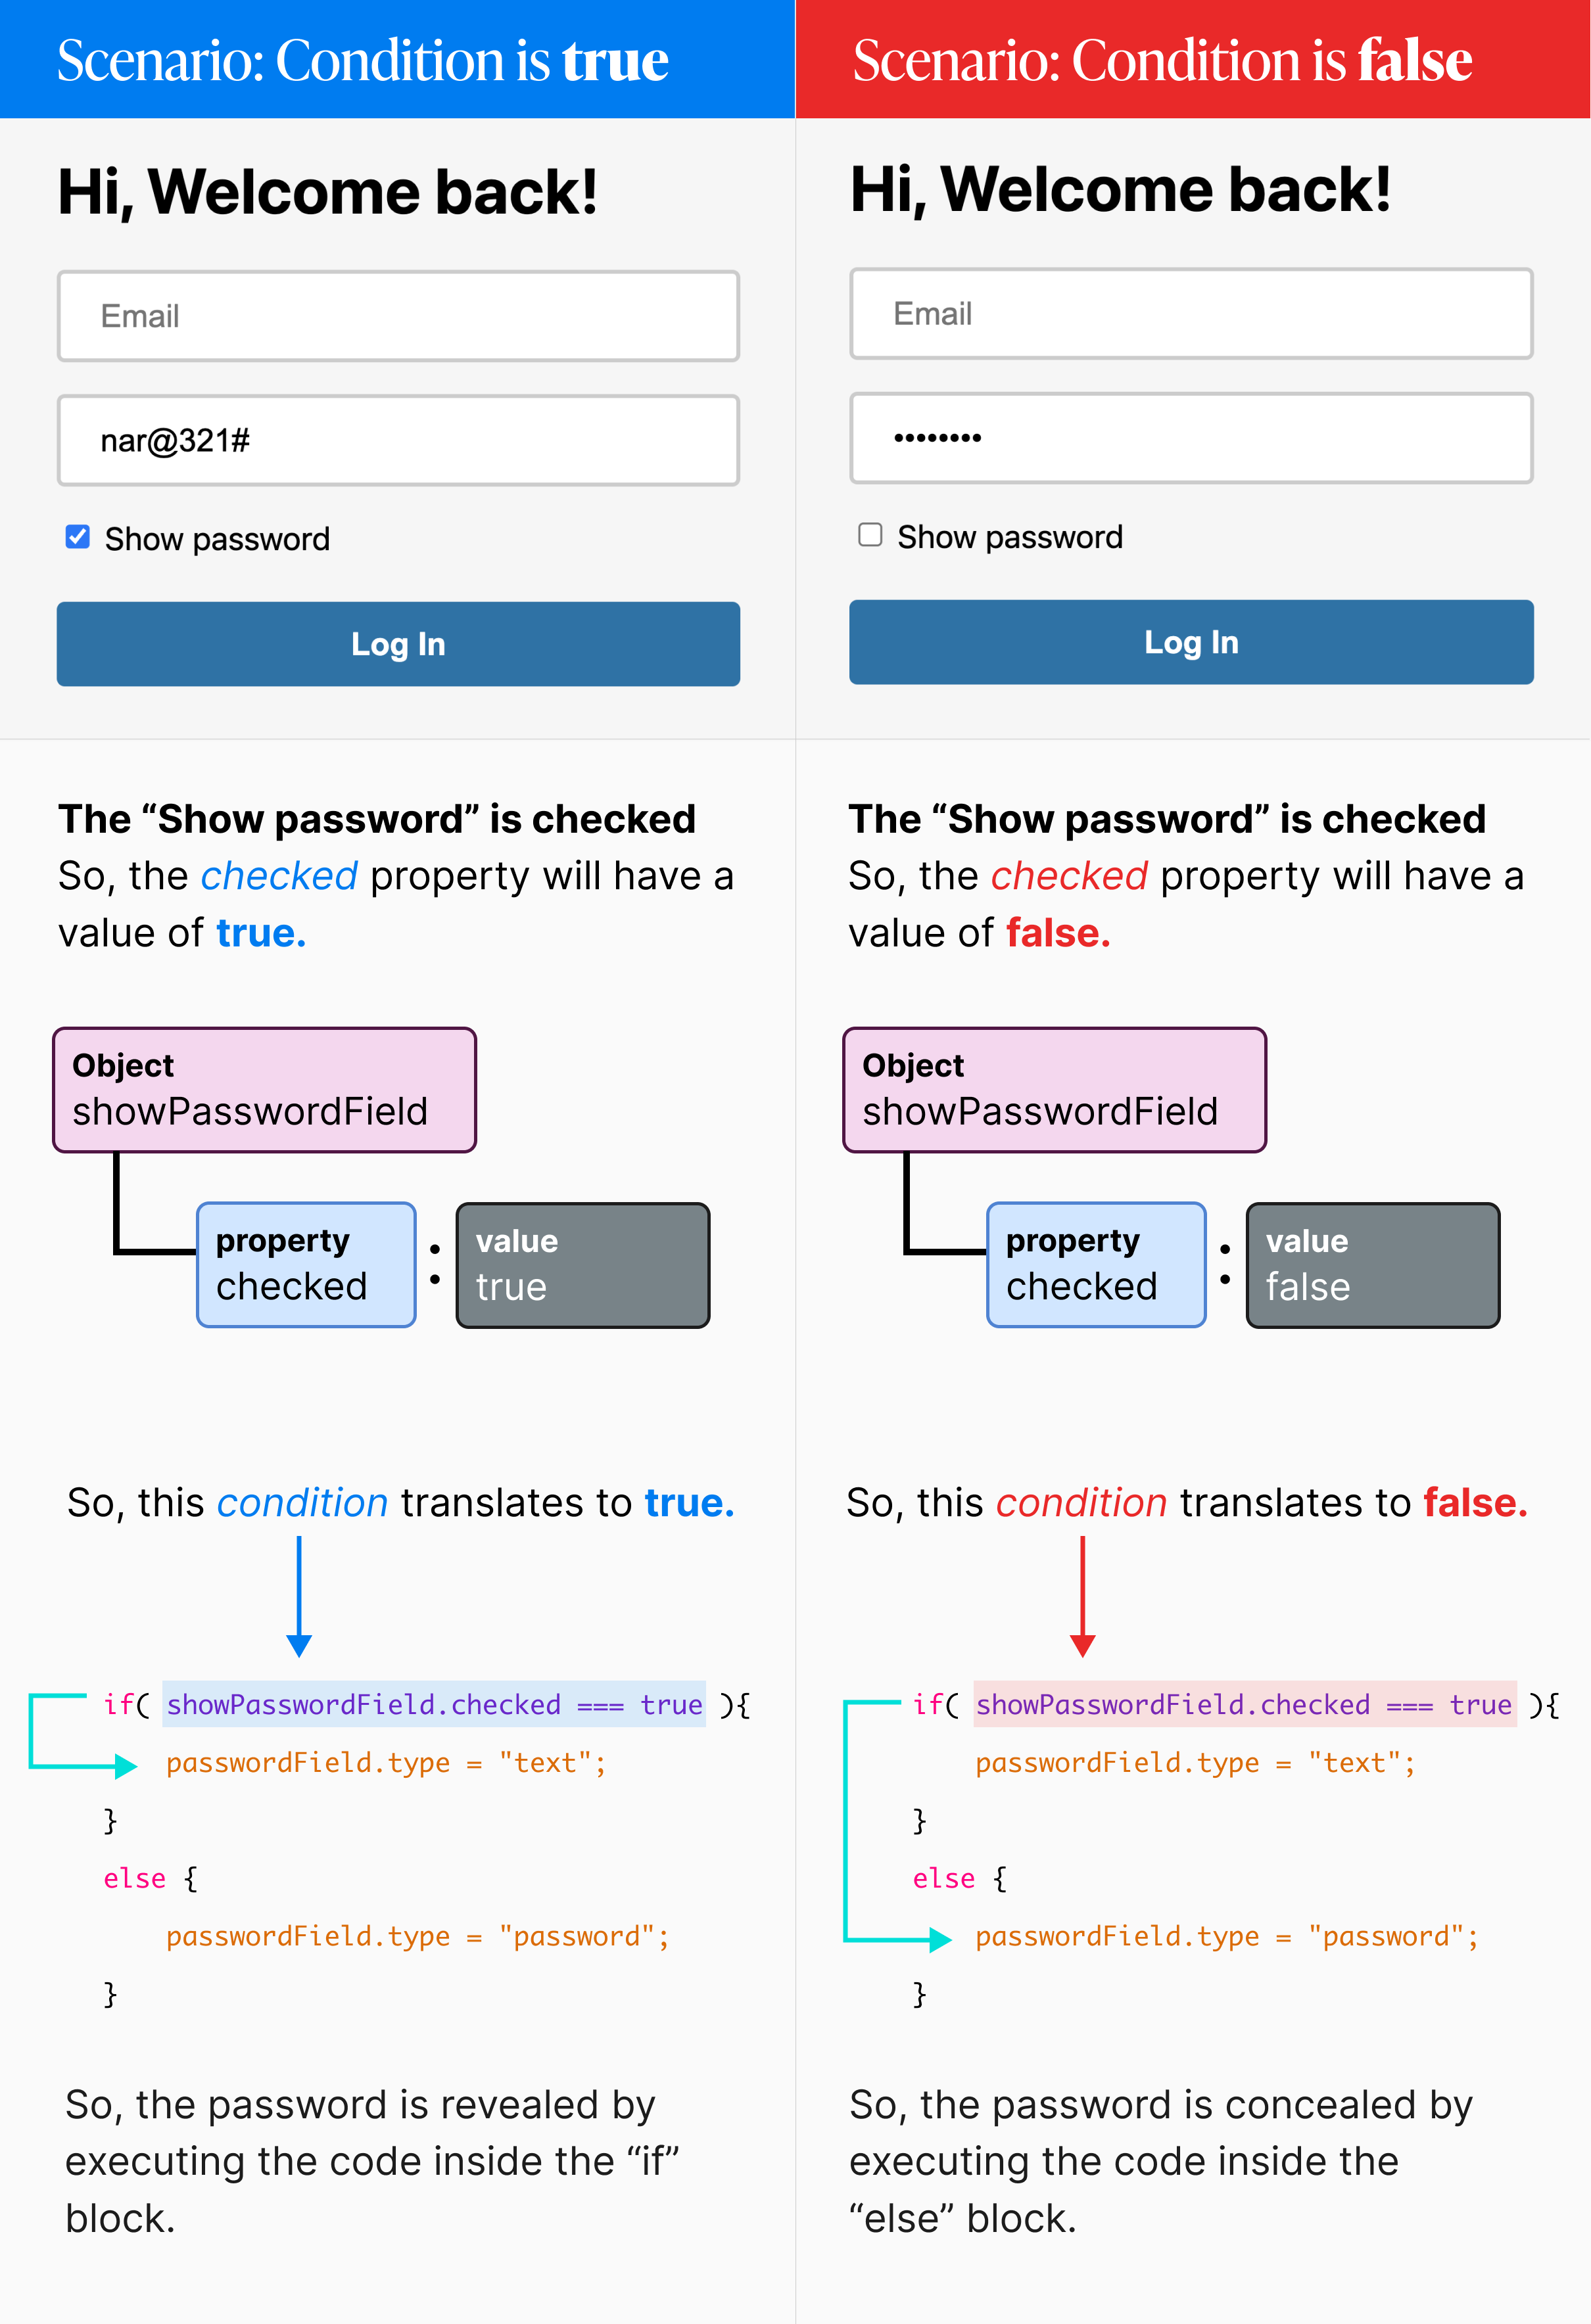
Next, when the computer comes across the If/else statement, it will first evaluate the condition (expression):
showPasswordField.checked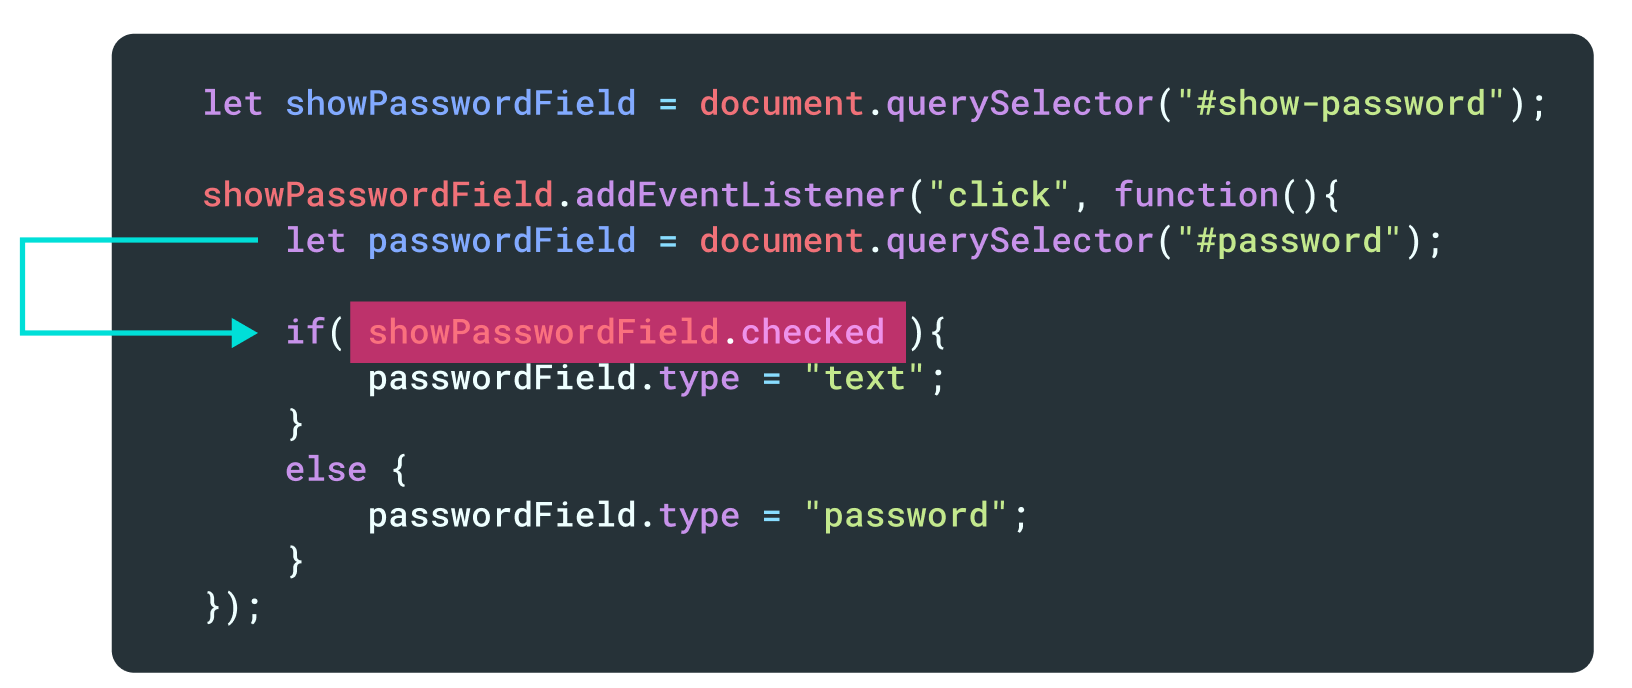
checked.If the checkbox field is checked, the value of the
checked property is true.And if it is not checked, the value of the
checked property is false.In our case, currently, the field is checked.
So, the expression showPasswordField.checked resolves to true, and the code inside the "If" block is executed.

Now, we want to reveal the password when the "Show password" field was checked, right?
So, Inside the "If" block, to reveal the password, we are just changing the input type of the "Password" field to "text".
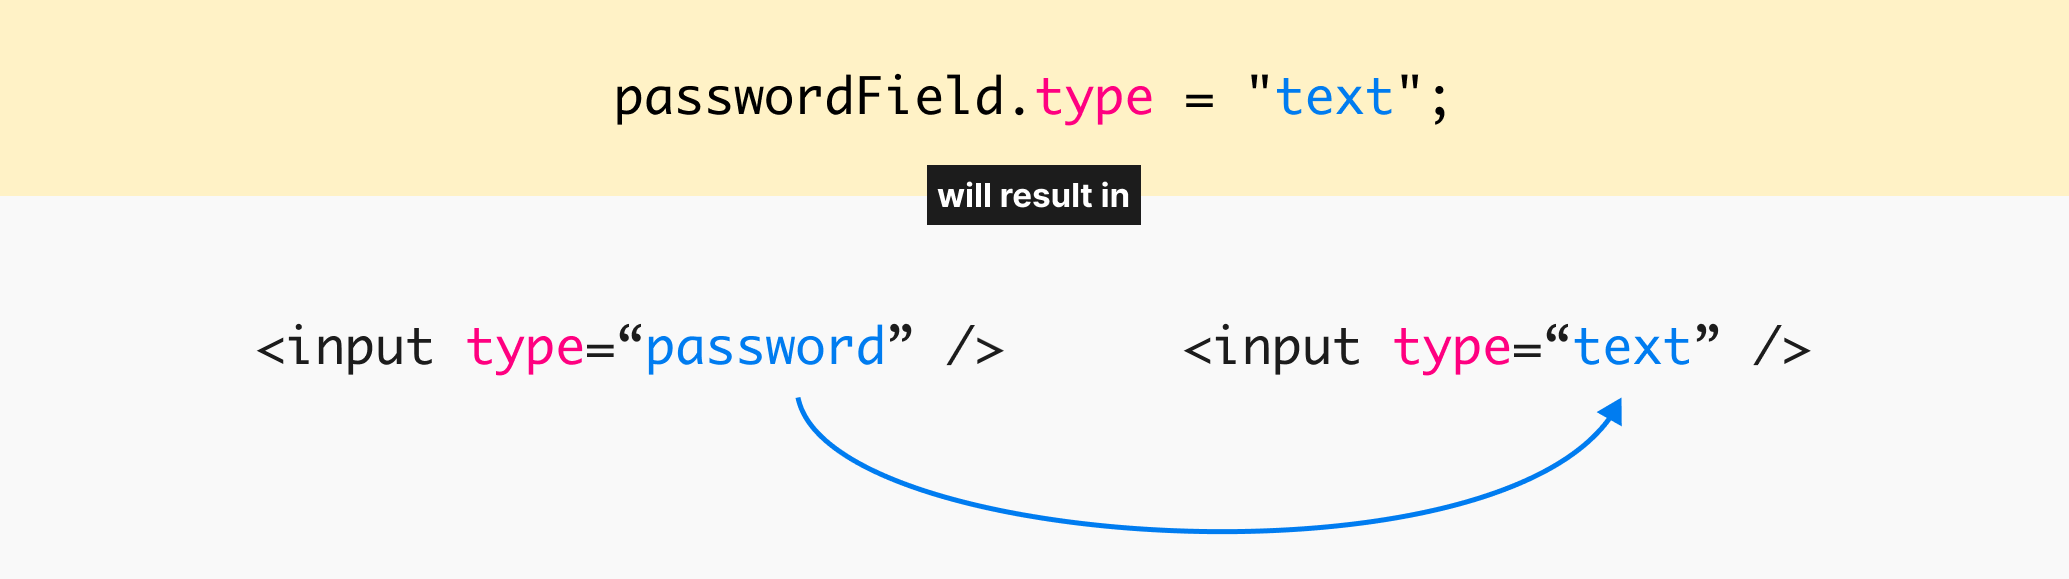
This results in:
After the code inside the "If" block is executed, because the condition is met, the code inside the "Else" block will be skipped completely.
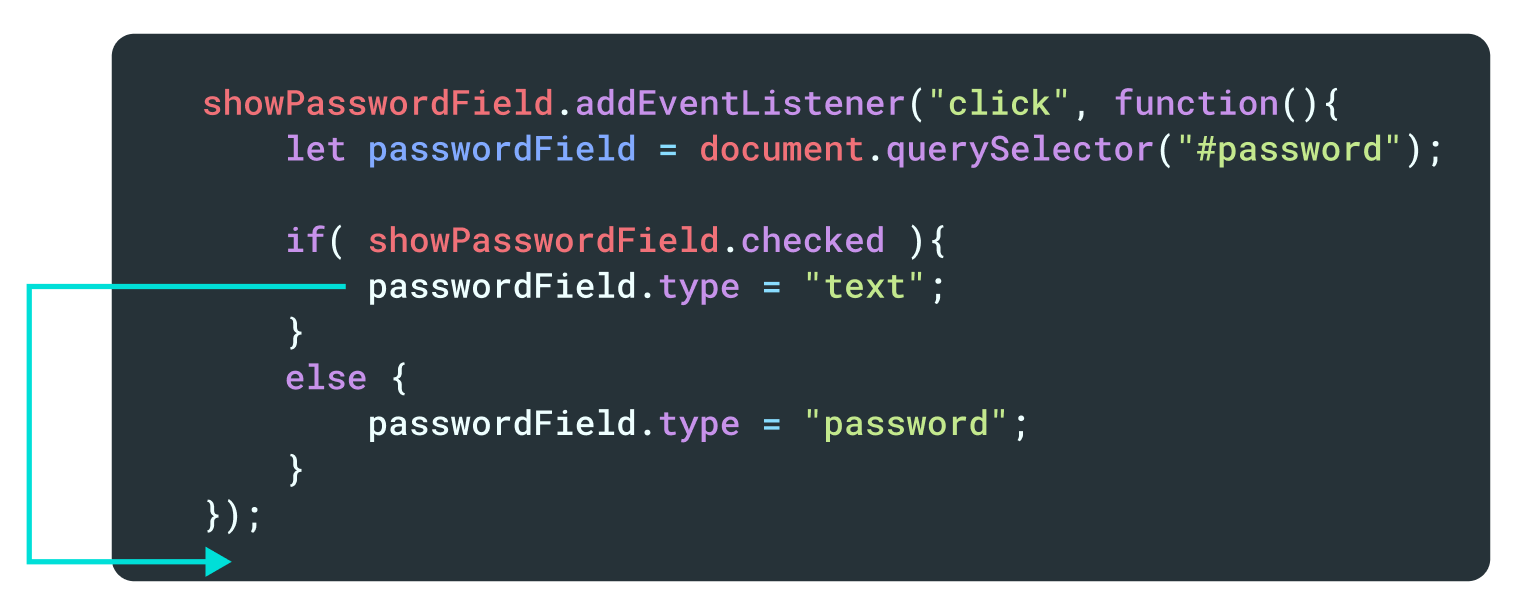
Also, after the else block, because there is nothing else to execute, the browser will come out of the event handler function completely and starts doing some other work that is not related to the index.js file.
Then, When the "Show password" field is clicked again...
The field will become unchecked.
And the code inside the event handler will start executing again.
The computer comes across the If/else statement again and it will evaluate the condition (expression):
showPasswordField.checkedBut this time, the "Show password" field is unchecked.
So, the expression will resolve to false and the code inside the "Else" block will get executed by skipping the code inside the "If" block.

We want to hide the password when the "Show password" field was unchecked, right?
So, Inside the "Else" block, to hide the password, we are changing the input type of the "Password" field back to "password".
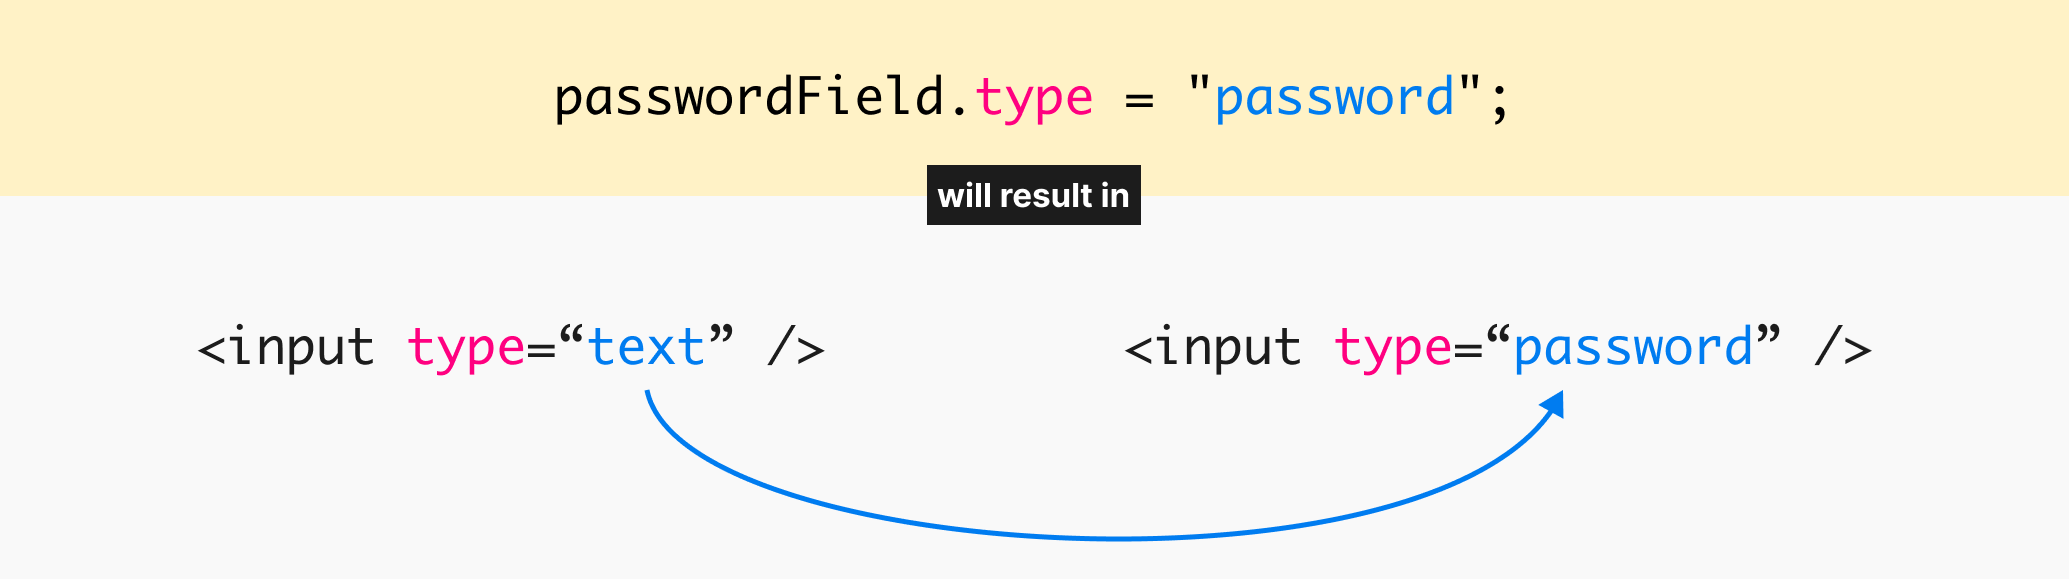
This results in:
Here is an infographic that is summarizing everything:
That is exactly how If/else statements and expressions work in real-world projects.
In the next lesson, we will cement our understanding of If/else statements by building a simple "Subscribe/Unsubscribe" button functionality.