Task: Detecting if Javascript is enabled

Sometimes, we need to check whether Javascript is enabled or not in the browser.
We do this to improve the accessibility of the page which relies heavily on Javascript.
For example, Gmail detects if Javascript is enabled or not before loading the inbox.
Gmail does this because it relies on Javascript heavily to provide a smooth user experience.
And, if Javascript is not enabled for some reason, Gmail provides you with a basic user experience that doesn't require Javascript.

This is Gmail's way of making the inbox accessible even if Javascript is not enabled.
And, this task is pretty common for a web developer too.

Got it. But how do we even detect Javascript?
Good question!
One of the easiest ways to detect Javascript is:
Step 1: Hard-coding the no-js class to the <body> element inside the HTML file.
<body class="no-js">
//...
</body>
Step 2: Later, once the Javascript is loaded, we will remove the no-js class and replace it with the js class.
The trick here is that if our Javascript code replaces the no-js class with the js class on the <body> element, then that tells us the Javascript is enabled in the browser.
Adding and removing classes using the document object
Come on, download the starter files and open the project folder inside the Code editor:
Next, if you open up the index.html file, you'll find a no-js class on the body element.
<body class="no-js page-template-home-page">
    ...
</body>
Now, our task is to remove the no-js class and replace it with the js class using Javascript without affecting the page-template-home-page class.
So, after we write our Javascript code, here is how the <body> element should look like this:
<body class="js page-template-home-page">
    ...
</body>
And, we can achieve this in three easy steps:
//Step 1: Select the body element and save it in a variable
let bodyElement = document.querySelector("body");

//Step 2: Remove the "no-js" class from the body element.
bodyElement.classList.remove("no-js");

//Step 3: Add the "js" class
bodyElement.classList.add("js");
Don't copy and paste the above code.
What follows is a detailed explanation of the above code. So follow along with me and type the code.
To follow along, look for the main.js file inside the project folder and open it up.
Step 1: Select the body element and save it
First, we have to select the body element in order to do anything with it.
And for selecting any HTML element inside Javascript, we have to use the document object.
So, type the below code inside the main.js file.
//Step 1: Select the body element and save it in a variable
let bodyElement = document.querySelector("body");
The bodyElement variable now contains the object related to the body element.
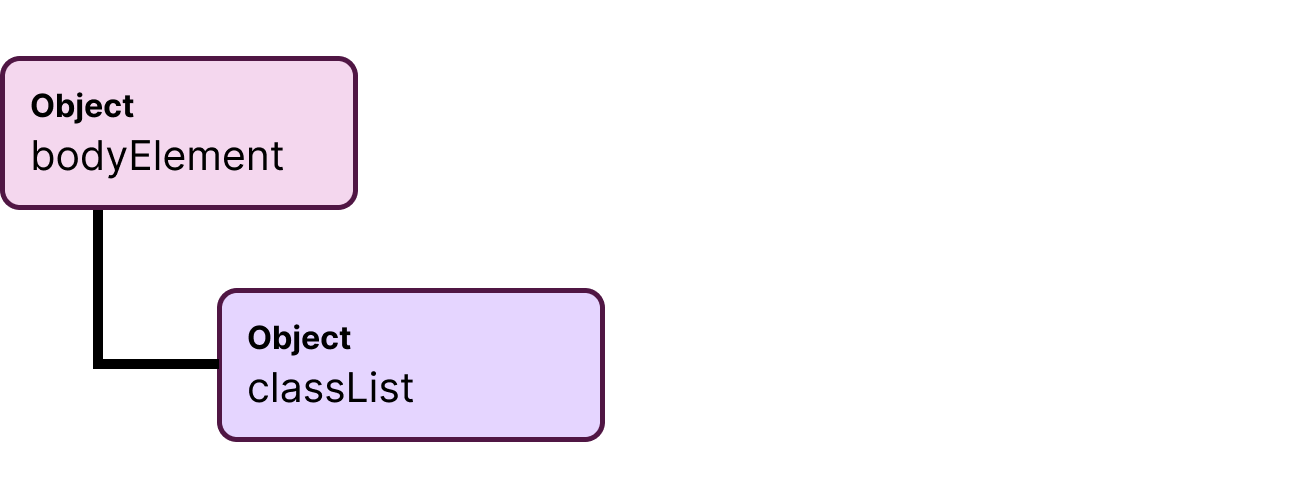
bodyElement.classList And the bodyElement object contains a child object called classList.
Step 2: Remove the "no-js" class from the body element.
The classList object helps you manage the CSS classes of an HTML element.
In other words, it contains methods that help you manage the classes of an HTML element.
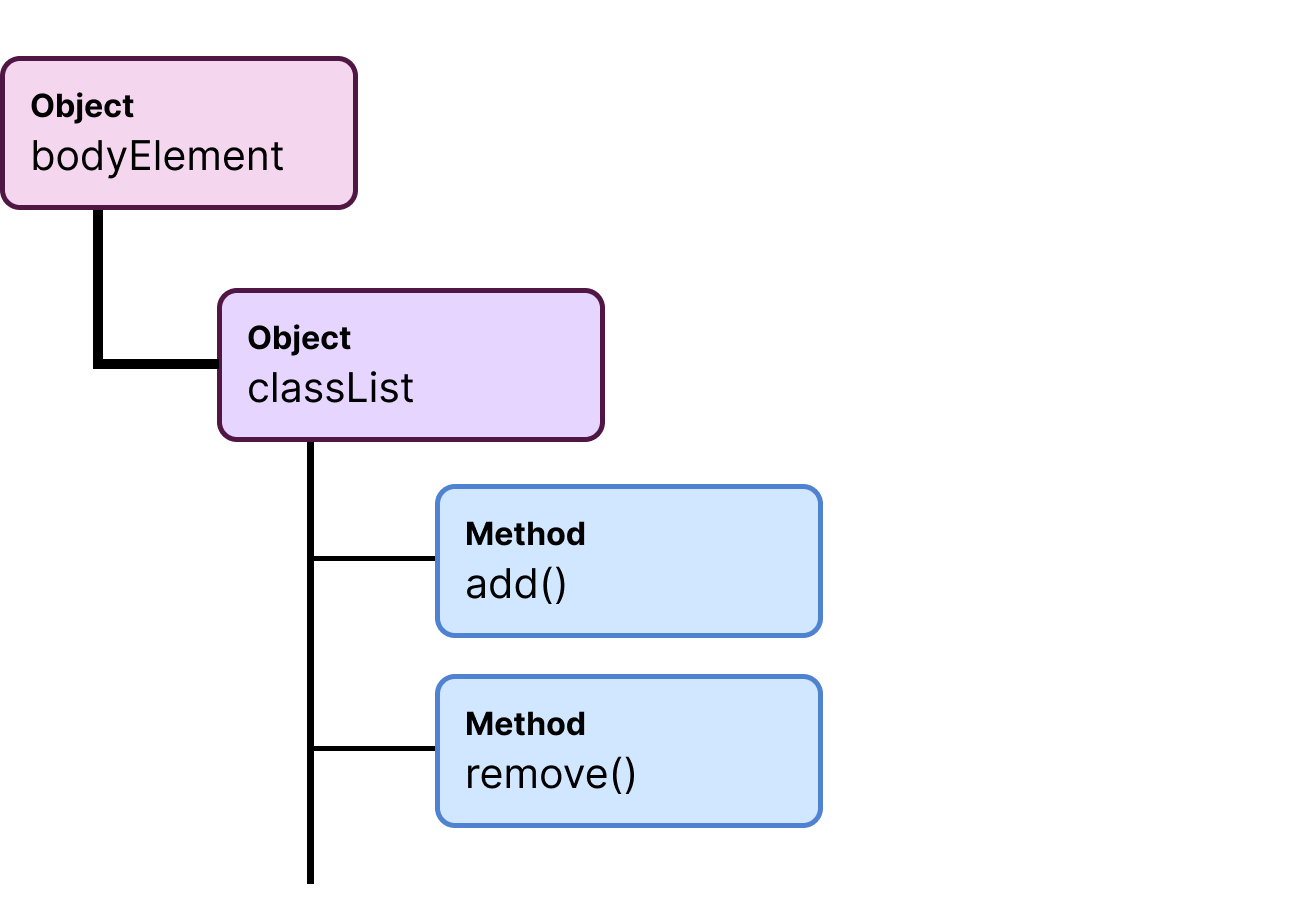
For example, there is a method called remove and it helps us remove a particular CSS class from the HTML element selected.
It accepts the name of a class as input:
htmlElement.classList.remove(className);And the class name must be surrounded by quotes:
<div class="sidebar">...</div>divElement.classList.remove("sidebar");Remember, we are just providing a class name surrounded by quotes.
Not a CSS selector.
So, we must avoid the . that comes before the class name.
// wrong usage. Avoid the dot
divElement.classList.remove(".sidebar");

// Correct Usage
divElement.classList.remove("sidebar");
Anyway, in the case of the body element, we want to remove the class no-js, right?
So, we have to provide the no-js class name as the input to the remove method:
//Step 2: Remove the "no-js" class from the body element.
bodyElement.classList.remove("no-js");
The above line of code will now remove the no-js class from the body element.
So, here is how the body element looks after executing the above line of code:
<body class="page-template-home-page">
    ...
</body>
Just to summarize the above line of code:
- The
bodyElementcontains thebodyelement as a Javascript object. - And this Javascript object contains a child object called
classList. - And, the
classListobject has a method calledremove. - So, using the
removemethod, we are removing theno-jsclass from thebodyelement.
Step 3: Add the "js" class to the body element.
Finally, we have to add the class called js to the Body element.
We can easily achieve this using the add method of the classList object:
//Step 3: Add the "js" class
bodyElement.classList.add("js");
The above line of code will now add the most awaited js class from the body element.
<body class="page-template-home-page js">
    ...
</body>
That's all.
These techniques are not just limited to the body element
Can we perform similar kinds of actions on any HTML element we select using Javascript?
Is classList object available if we select any other HTML element other than body element?
The answer to both questions is a loud yes.
These methods and properties are common to all HTML elements.
let sidebarElement = document.querySelector(".sidebar");
let modalElement = document.querySelector("#popup");

sidebarElement.classList.add("sticky");
modalElement.classList.remove("hidePopup");
As you can see, the classList object and its methods like add are part of every HTML element we select.
So, you can use them similarly on every HTML element you select using Javascript.
Anyway, here are the finished files for this project:
And in the next lesson, I will show you how to achieve the same task in a simpler way.